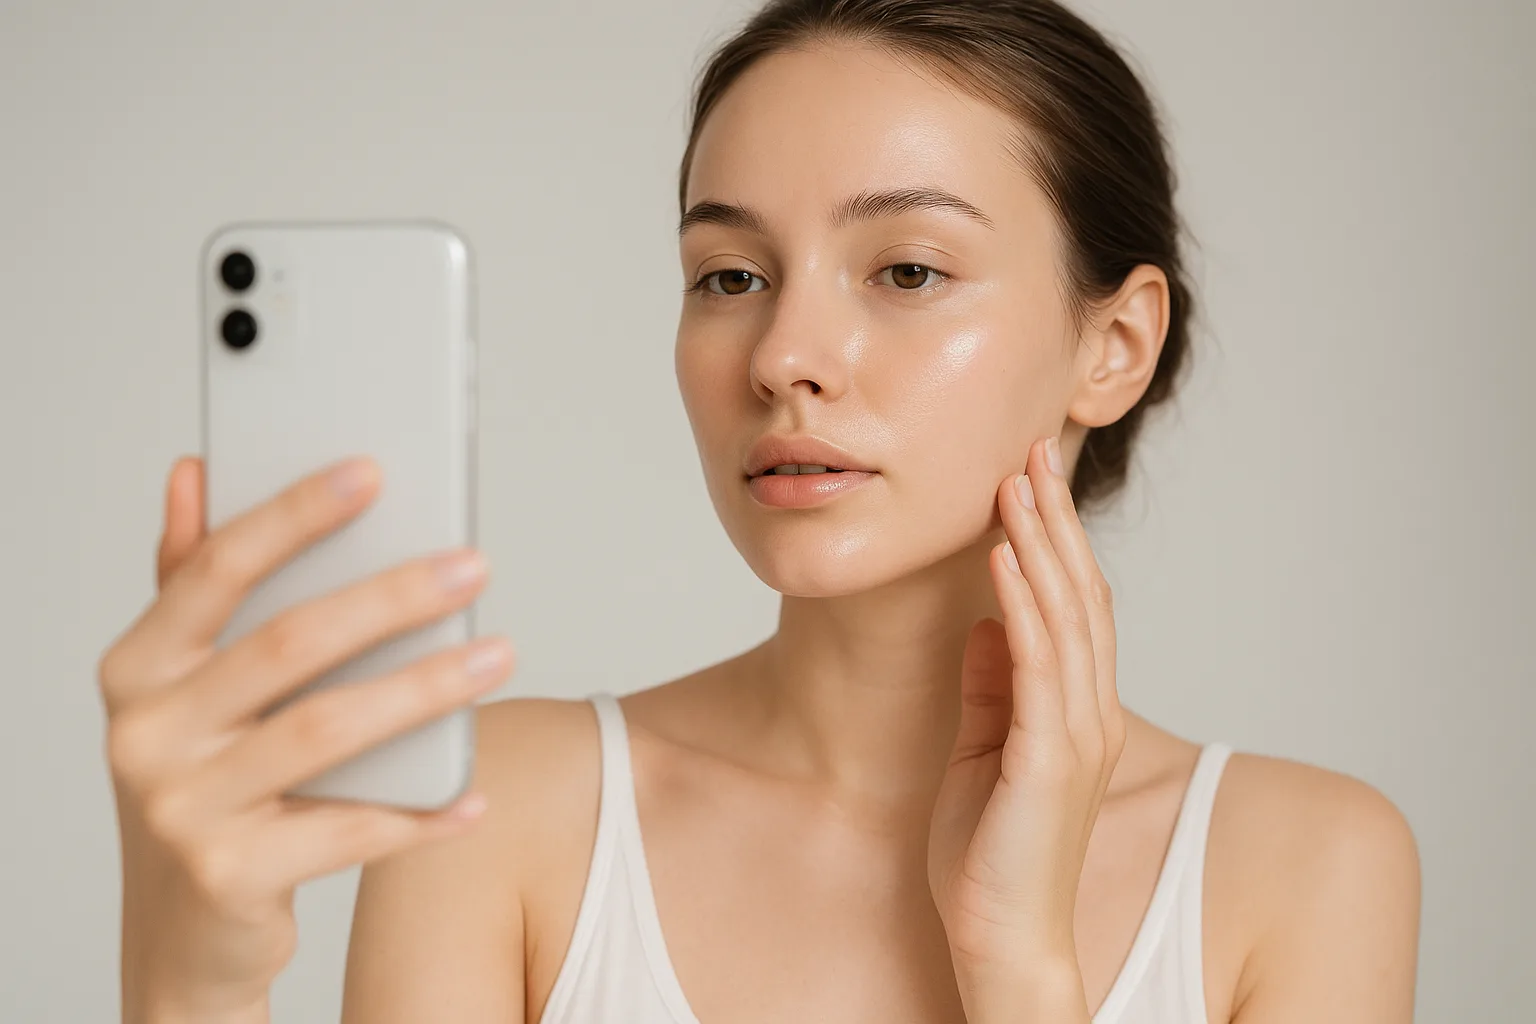
AI Skin Photo Analysis: How to Take Better Selfies
A skin analysis is only as useful as the photo behind it. AI can compare tone, texture, pigmentation, redness, and visible concerns with impressive speed, but it still needs a clear image to work from. A darker bathroom mirror, harsh overhead light, shiny skin, or a slightly tilted face can turn a solid scan into a confusing one.
For Lumino Skin, the tool works best as a tracking companion: it can help organize patterns over time without turning a scan into a final verdict. The photo is the foundation. If the foundation is shaky, even the smartest analysis has less to build on.
Good lighting helps the camera see what the skin is actually doing. Too much shadow can hide texture or make pigmentation look deeper than it is. Too much glare can flatten the skin and hide pores, fine lines, or dry patches. A small tilt can make one side of the face look different from the other, and that can throw off the comparison.
The goal is not to take a perfect beauty selfie. This is skincare documentation, not a polished portrait. The best photos are simple, consistent, and easy to read: clean skin, neutral expression, face pointed toward the camera, and light coming from the front. Natural daylight near a window often works beautifully because it is soft and balanced. If using indoor light, avoid the mix of ceiling light, window light, and warm lamps that can make skin look yellow, blue, or orange depending on the angle.
Consistency matters just as much as quality. The same lighting, distance, angle, expression, and skin condition make it easier to track changes over time. A photo taken after a long day, with makeup, redness, or fresh skincare can still be useful, but it may not be the best choice for comparing progress week to week. For the clearest baseline, start with clean, dry skin and a calm, natural face.
This is where photo quality changes everything. The better the image, the more confidently the system can spot patterns, and the more useful the results become over time.
Why Photo Quality Changes AI Skin Analysis Results
AI skin analysis depends on clear input. Advanced software can do a lot, but it still needs a readable image. If the photo is too dark, too bright, blurry, or taken from an awkward angle, the system has less information to work with.
Before worrying about what the analysis is detecting, it helps to understand what the system is seeing. The tool is looking for patterns in the image, from pore size and skin texture to redness, pigmentation, and fine lines. That is the core idea behind AI skin photo analysis: the system compares visible features, tracks changes, and helps turn everyday photos into useful insights over time.
Lighting is one of the biggest variables. Too much shadow can make texture look deeper than it is, while harsh overhead light can flatten the face and hide fine lines. Direct sunlight can create glare on the nose, forehead, and cheeks, which can make pigmentation or redness harder to read. The best photos usually come from soft, even light, like natural daylight near a window or a well-lit room without strong color casts.
Blur is another quiet problem. When a selfie is slightly out of focus, pores, flaky patches, and tiny lines lose definition. The system may still produce a result, but it has less detail to work with. The same goes for distance. If the face is too far away, the image may not capture enough detail for a meaningful skin texture check. Too close, and the camera can distort the face or crop out important areas like the jawline, temples, or under-eye region.
Glare and face angle matter more than people expect. A shiny T-zone can hide texture, while a tilted head can change how shadows fall across the cheeks, forehead, and nose. Even a small angle shift can make one side of the face look different from the other, which affects comparison over time.
Skin changes are often subtle, so the details matter. Better selfies do not just make the result look nicer. They give the system clearer data, so the analysis can be more useful when comparing scans week after week.
Set Up a Repeatable Scan Station
A repeatable scan station is the skincare equivalent of a favorite morning routine. It is simple, repeatable, and consistent enough that the results start to make sense. The goal is not to turn a bathroom counter into a photo studio. The goal is to make every scan feel like it came from the same place, at the same angle, with the same kind of light, so future images can actually be compared.
Lighting matters most. Harsh overhead lights create shadows under the eyes, nose, and chin. Window light can be beautiful, but it changes fast. A soft, even light is the sweet spot. Stand facing a window during the day, but avoid direct sun hitting the face. If the light is too bright, pull up a sheer curtain. If the room feels dim, add a lamp on the opposite side, but keep it gentle. The face should look clear and evenly lit, not shiny, washed out, or shadowed.
The background matters more than it seems. A busy bathroom, open closet, or mirror clutter can distract from the frame and make it harder to focus on the skin. Choose a neutral wall, a plain door, or a simple corner of the room. Keep the area clean and uncluttered. This is also a good moment to clear anything that could distract from the scan, like towels, products, jewelry, or hair accessories.
Camera height is another quiet game changer. Hold the phone or camera at the same height each time, ideally around eye level or slightly above. Too low can change the shape of the face. Too high can throw shadows under the eyes and chin. Pick one height and stick with it. If using a stand, use it every time. If holding the phone by hand, get comfortable with the same grip and distance.
Enough space is the final piece. Step back far enough to keep the face framed the same way each time, with a little breathing room around the head and shoulders. The face should sit in a consistent spot in the frame, especially around the forehead, cheeks, nose, jaw, and chin. Small changes in distance can make pores, redness, or texture look different even when nothing has changed on the skin.
Once the station feels reliable, the scan becomes part of a routine instead of a one-off photo session. That consistency gives the system something steadier to work with and helps track changes over time, which is an important part of understanding skin health.
Choose the Right Angles for Full-Face and Problem-Area Scans
With the setup steady, the next question is what the camera should capture. A good scan is less about flattering a face and more about giving the system clear information to compare over time. The straight-on full-face image is useful because it shows the whole picture. From this angle, the system can look at overall tone, balance, redness, pigmentation, texture, and symmetry across both sides of the face.
Symmetry does not mean everyone needs a perfectly matched face. It means the scan gives a fair way to compare the left and right sides, spot uneven shadowing, and notice changes that might be easy to miss day to day. A relaxed, centered, straight-on view helps the system understand the face as one complete canvas.
Closer images add the detail. Different parts of the face can behave differently, and modern face mapping is all about understanding those zones. Forehead skin may show oiliness, texture, or congestion. The nose and T-zone can reveal shine, enlarged pores, or clogged-looking areas. Cheeks may show redness, sensitivity, dryness, or pigmentation. The chin and jawline can shift with hormones, friction, or dry patches.
A full-face scan and a few problem-area scans work better together. The full-face photo gives context, while close-ups give the system more detail where changes often start. The closer views should be taken from the same distance, in similar lighting, and with the same areas centered in the frame.
Think of it as building a small visual file for the skin. The straight-on image tells the story from far enough away to see the overall pattern. The closer images zoom in on the chapters that may need a little extra attention.
For the cleanest results, keep the face relaxed, hair away from the forehead and jawline, and avoid dramatic angles that change the shape of the nose, cheeks, or chin. The goal is not to create a perfect selfie. The goal is to create a clear, repeatable view an AI skin analysis tool can actually learn from.
Prepare Your Skin Without Distorting the Scan
The best scan is boring. The skin should look like its normal baseline, with no tricks, no filters, and no last-minute skincare theatrics.
Start with clean skin. Clean means fresh, calm, and free of residue, not stripped or overworked. Use lukewarm water and a gentle cleanser if needed, then pat dry. Skip scrubs, exfoliating brushes, masks, toners, and any product that leaves a tingling feeling. That kind of prep can make skin look pink, tight, shiny, or flaky, which can throw off the analysis.
Aim for product-free skin right before the scan. Makeup is the obvious one, since foundation, concealer, powder, bronzer, and sunscreen can all shift color and texture. Serums, treatments, and heavy moisturizers can do the same. Active ingredients are especially easy to underestimate. Retinoids, acids, vitamin C, benzoyl peroxide, and exfoliating masks may help long term, but on scan day they can change the surface of the skin through dryness, peeling, redness, or extra oil production.
Over-moisturizing can distort the scan as well. A thick cream can soften the look of fine lines and blur pores, while a lightweight moisturizer may disappear cleanly. Neither version is wrong, but they are different versions of skin. For the most useful comparison, keep the routine consistent from photo to photo. Morning scans should be taken after the same cleansing and skincare steps each time. If dry skin tends to look flaky after washing, use the same gentle moisturizer already tolerated, let it fully absorb, and photograph under the same conditions.
Consistency matters more than trying to make the photo look perfect. The goal is not to create a showroom face. The goal is to give the scan an honest baseline so changes over time are easier to read. If the skin is irritated, freshly exfoliated, or covered in new products, the image may capture the effect of the product rather than the skin itself.
A calm, rested barrier gives the cleanest starting point. If the skin feels tight, reactive, or flaky, pause the experiment and focus on barrier support. Read more about protecting the skin barrier at /blog/repair-skin-barrier-2025 before taking another comparison photo.
What to Capture for Common Skin Concerns
The goal is to catch one photo that can be compared to the next one. Think of each image as a data point. The pattern over time does the heavy lifting.
For under-eye changes, capture a straight-on photo with eyes open, a relaxed close-up, and a second shot with eyes gently looking upward. The upward view can help show shadowing, puffiness, and hollowing without relying on expression. Keep the face neutral, avoid squinting, and use the same lighting. Under-eye appearance can change from allergies, salt, sleep, water retention, and sun exposure, so the most useful comparison is a clean series over weeks. For more background on what can influence this area, the under-eye dark circles guide is a helpful place to start.
For dark spots, use a close-up with enough surrounding skin to show location and shape. Capture the same area from the same angle, ideally in soft natural light without flash. Flash can bounce off pigment and make edges look harsher. If tracking hyperpigmentation, it helps to include landmarks like the cheekbone, temple, or upper lip so changes are easier to compare later. This dark spots and hyperpigmentation guide can also help make sense of what is changing.
For redness, a wider face shot is useful because it shows the bigger picture across cheeks, nose, chin, and jaw. Add a close-up of the reddest area if there is a specific patch to monitor. Take these photos when the skin is calm, not right after a workout, a hot shower, a new active, or a facial. Redness can flare quickly, so repeatable conditions matter more than intensity.
For texture, the best photo is a close-up with soft side light. This can reveal roughness, bumps, flakiness, and uneven smoothness without looking harsh. Capture the forehead, cheeks, and chin, then repeat under the same conditions. A filter or beauty mode can smooth away the very details that make tracking useful.
For pores, focus on the T-zone and cheeks with the camera close enough to see detail but not so close that the skin distorts. Avoid flash, oil, and heavy moisturizer right before the shot. The goal is to track whether pores look more visible over time, not to judge them from one glossy image.
For hydration-related dullness, use a front-facing photo in consistent light and a slightly angled shot to catch how light reflects across the skin. Dehydrated-looking skin can appear flat, tired, or uneven even when the barrier is otherwise healthy. Track this over time alongside skincare changes, weather, sleep, and product use.
Build a Skin Tracking Schedule
A good skin tracking schedule keeps the process simple enough to actually repeat. The goal is not to turn selfies into homework. The goal is to collect enough consistent photos to spot patterns over time.
For most people, weekly photos work well if tracking something that can shift quickly, like breakouts, redness, dryness, irritation, or how the skin responds to a new routine. Monthly photos are better for slower concerns, such as dark spots, overall tone, fine lines, texture, or long-term changes from a treatment plan. Think of it like checking in with the skin rather than judging it every day.
Pick one day each week or month, then make it part of an existing habit. A Sunday morning after cleansing works for some people. A monthly check-in on the first Saturday works for others. The exact day matters less than the consistency. Try to keep the same setup each time: same room, same light, same distance, clean face, and no filters.
It also helps to keep a quick note beside each photo. A photo becomes much more useful when the trend has context. If a week looks rough, consider what was happening around it. Did sleep slip? Stress spike? Travel happen? The weather turn windy, cold, humid, or unusually sunny? Those details matter because skin rarely changes in isolation.
Sleep can influence inflammation, recovery, and the skin barrier. If tracking redness, dullness, puffiness, or breakouts, check in with a sleep guide like sleep and see whether the pattern lines up with restless nights or shorter sleep.
Product changes deserve their own notes too. When a new cleanser, retinoid, exfoliant, moisturizer, sunscreen, or serum enters the routine, write down the date. That way a reaction does not get mistaken for a random flare-up. The same goes for weather, workouts, travel, menstrual cycles, and major life stress. Small notes make the photos easier to read.
The best schedule is the one that can be kept without overthinking. Even a simple monthly photo with a few notes can reveal more than a dozen rushed selfies taken under different lighting.
Understand the Limits of a Mobile Skin Scan
A mobile skin scan can be surprisingly useful, yet it is easy to read too much into it. Think of AI skin analysis as a pattern-finding tool. It can help notice changes in tone, texture, redness, dark spots, dryness, or the way a patch looks over time. It can also make a photo log feel less random. That is valuable.
It is not a medical diagnosis. It does not know whether a spot is harmless, irritated, allergic, infected, precancerous, or something else. It does not replace a dermatologist or trained clinician who can look at the whole picture, ask the right questions, and use tools that are not available in a phone. If a change is new, growing, bleeding, itchy, painful, scaly, or unlike usual skin, it deserves professional attention. The same goes for a mole with asymmetry, uneven borders, multiple colors, or a changing diameter. Trust your gut and get it checked.
Accuracy can also shift depending on the photo itself. Warm bathroom lighting can make skin look rosier. Harsh overhead light can emphasize texture, shadows, or fine lines. Blue screen light can cool the image in a way that changes how pigment appears. A phone camera may soften detail, add noise, or auto-enhance the image without notice. Even a tiny angle change can make pores, redness, or pigmentation look different from one session to the next. This is why consistent photos are so helpful: same place, same light, same distance, clean face, no makeup.
Skin of color deserves extra care here. Hyperpigmentation, post-inflammatory marks, redness, and vascular changes can show up differently across deeper and lighter complexions. Software and training data can vary by skin tone and by how well the model was trained across complexions. The goal is to look for patterns in one's own skin over time, not to judge skin against a narrow default. For a deeper dive into fairer, more inclusive tracking, the skincare for skin of color guide is a helpful place to start: /blog/skincare-for-skin-of-color-guide
That is also why AI skin analysis and dermatology are different tools with different jobs. A mobile scan can help stay aware and prepared. A clinician can evaluate, diagnose, and recommend treatment when needed. More on that here: /blog/ai-skin-analysis-vs-dermatologist
The smartest use of a mobile scan is humble and practical. Use it to track trends, ask better questions, and notice what deserves closer attention. Then pair those observations with simple skincare decisions that fit the skin, the routine, and the user's life.
Conclusion: Making Better Photos Work for Your Routine
Photos become useful when they become a record, not a one-time selfie dump. A single picture can tell a lot, but a steady photo history can tell what the skin is actually doing over time. That is where skincare starts to feel less like guesswork and more like an ongoing conversation with the skin.
Consistent photos make progress easier to see. It is easy to feel like nothing is changing when looking in the mirror every day. The skin changes slowly, and the brain gets used to small shifts. But when comparing photos taken under similar conditions, improvements become clearer. A clogged pore that used to flare up every week may finally be staying calmer. Redness may look softer. Texture may look smoother. Dark spots may fade in a way that is harder to notice day to day.
The key is repeatability. The photo does not need to be perfect. It needs to be repeatable. Same kind of light, similar distance, similar angle, clean skin, no filter, and no heavy makeup coverage. Morning or evening, choose one and stick with it. Over time, those images become a personal skin timeline. They help separate real change from mood, weather, stress, or the occasional breakout that makes everything feel dramatic.
Photos also help spot recurring triggers. A breakout after travel, a flare after a new product, extra dryness after cold weather, more oiliness during a stressful week, or redness after skipping sunscreen. When those moments are connected to photos, patterns become easier to spot. That is how skincare becomes more evidence-based. Instead of reacting to one bad skin day by changing everything, the bigger picture can be examined and smarter choices made.
This is also where a tailored skincare routine can help. If photos show that certain areas are more sensitive, oily, dry, or reactive, a routine can be adjusted with more intention. A consistent routine can translate those observations into product priorities, routine steps, and balance across cleansing, hydration, treatment, and protection. That kind of guidance can make sense of what the photos are already showing.
The goal is not to become obsessed with the skin. The goal is to stop treating every change like an emergency. Photos give a calmer, clearer way to make decisions. They help notice what helps, what irritates, and what simply takes time.
The goal of taking better selfies is not to become a skincare detective. It is to give a routine better information. When photos are taken with the same light, same distance, same angle, and same prep, they become much more useful. A slightly different mirror, a filter, or a harsh overhead light can make skin look smoother, redder, drier, or more textured than it really is.
Consistency matters because skin changes are often subtle. A new spot, a patch of dryness, a change in oiliness, or a dark mark fading slowly may not stand out in the moment. But when the photos line up over time, patterns start to show. AI skin photo analysis can be genuinely helpful here. It can support one's own observations and make trends easier to notice, especially when using the same routine and the same photo setup.
Context matters too. Photos are most useful when they tell the full story. Was the skin cleansed or made up? Was the room bright or dim? Was the photo taken after a workout, a stressful week, a new product, or a long flight? Those details matter because skin rarely changes in a vacuum. A breakout after trying a new cleanser means something different from a breakout during a busy week. A dull-looking photo on a rainy morning means something different from dull-looking skin that shows up under consistent lighting every week.
Realistic expectations are the final piece. AI can help track changes, compare images, and make patterns more visible, but it should not turn a phone into a diagnosis machine. Skin is complicated. Lighting can fool the eye, products can irritate the skin, hormones can shift things, and some changes are simply hard to interpret from a selfie.
The strongest routine is a steady one. Take photos in the same conditions, review them over time, and use them to support decisions about skincare, not panic about them. If something feels unusual, painful, persistent, spreading, bleeding, or hard to understand, professional care is the right move.
Better selfies are not about chasing perfect skin. They are about giving the skin a clearer voice over time. And that voice becomes much easier to hear when the photo routine is consistent, the context is clear, and the expectations are realistic.
Drafted using Lumino AI.
This content is for informational purposes only and is not medical advice.
Learn how we review skincare guidance in our methodology.
Last updated: July 30, 2026
Written by
Lumino AI